
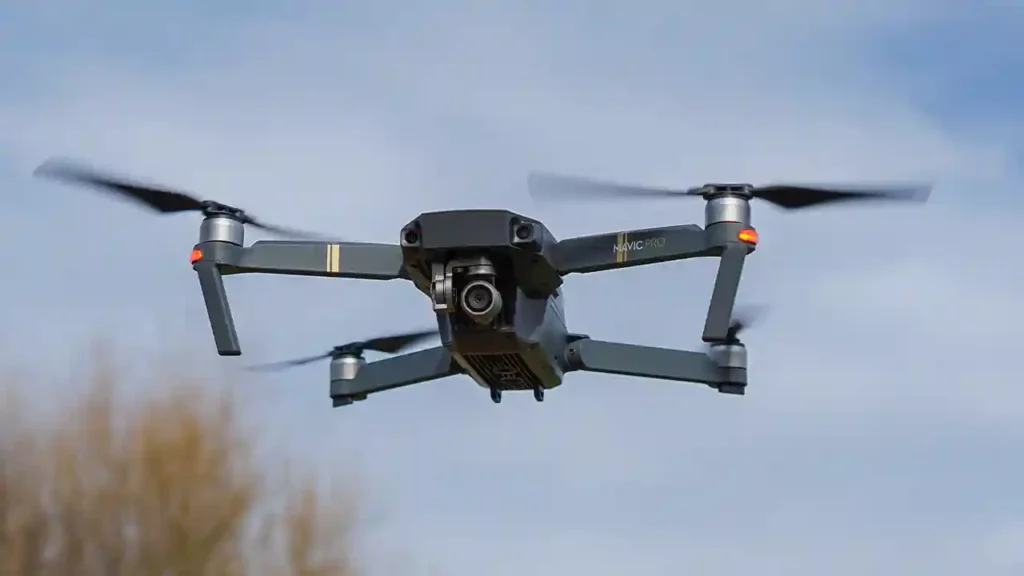
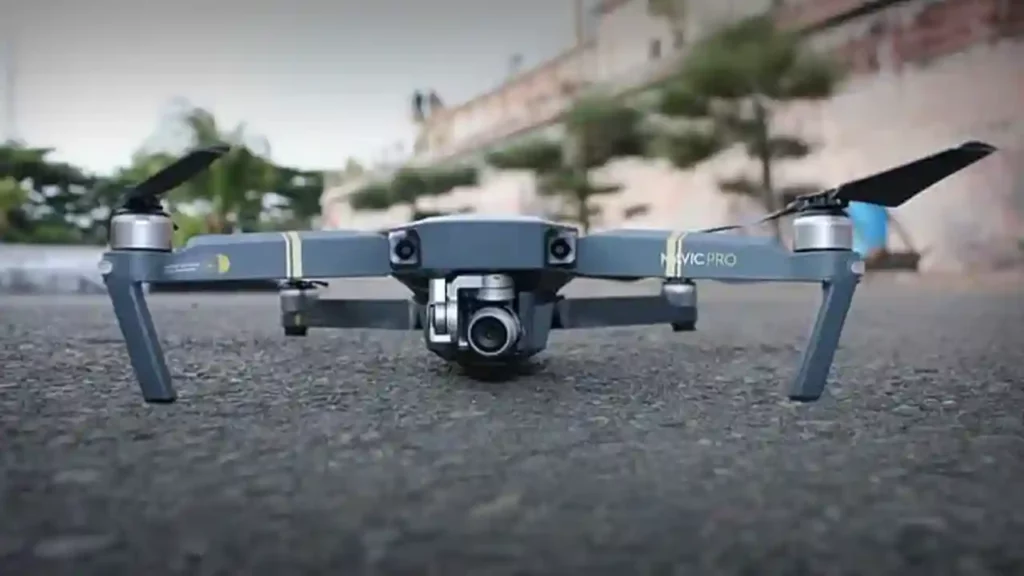
Dronelost.com – The DJI Mavic Pro is one of the most popular and versatile drones on the market. It has a compact design, a powerful camera, and a long battery life. It can fly up to 7 km away, capture stunning 4K videos, and avoid obstacles with its intelligent sensors. It is a great drone for beginners and professionals alike.
However, like any other electronic device, the Mavic Pro is not perfect. It can encounter some problems that can affect its performance, safety, and user experience. Some of these problems are minor and easy to fix, while others are more serious and require professional assistance.
We will discuss common problems with Mavic Pro and how to fix them. We will also provide some tips and tricks to prevent these problems from happening in the first place.
Whether you are a new or experienced Mavic Pro user, this blog post will help you troubleshoot and solve some of the most common issues with your drone.
Common Problems with Mavic Pro
By following our advice, you will be able to enjoy your Mavic Pro to the fullest and avoid any frustration or disappointment. Let’s get started!
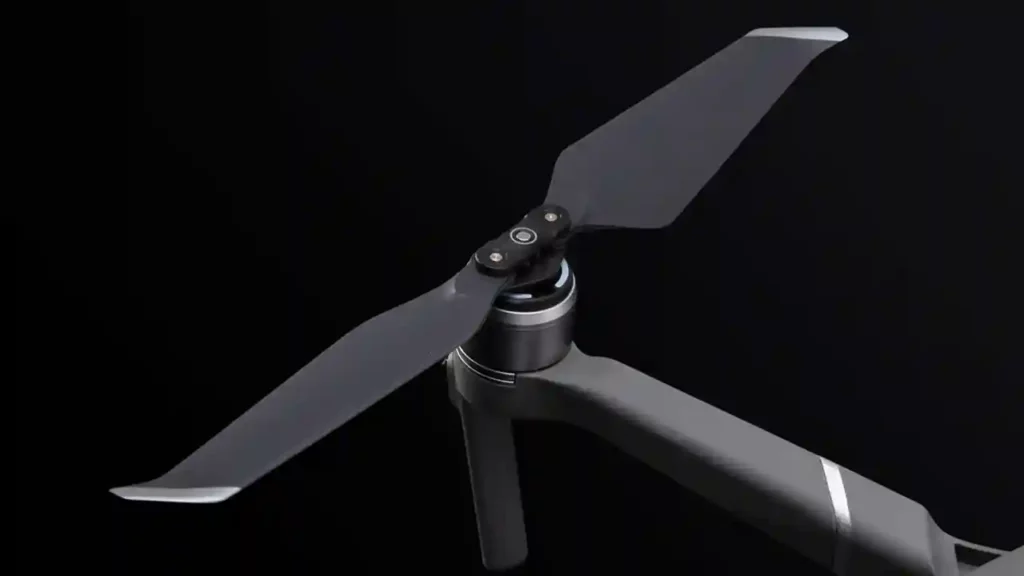
1. Gimbal panning issues
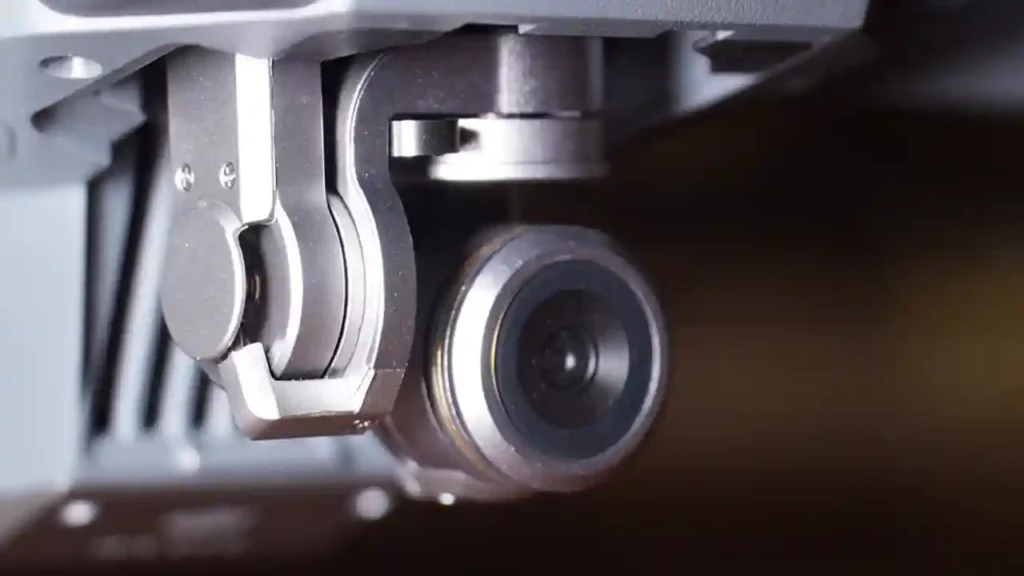
One of the most important features of the Mavic Pro is the gimbal. The gimbal is the mechanism that stabilizes the camera and allows it to move smoothly and accurately. Without a functioning gimbal, the camera would produce shaky and distorted images and videos.
One of the most common problems with the Mavic Pro gimbal is the panning issue. This is when the gimbal moves erratically or does not respond to the controller commands. This can result in blurry, tilted, or crooked shots. The panning issue can be caused by several factors, such as:
- Damage to the gimbal during shipping, transportation, or crash
- Interference from the clear gimbal cover or other objects
- Loose or faulty gimbal cables or connectors
- Software glitches or firmware updates
To fix the gimbal panning issue, you can try the following solutions:
- Remove the clear gimbal cover and any other objects that might obstruct the gimbal movement. Make sure the gimbal is free to rotate and tilt in all directions.
- Check the gimbal cables and connectors for any damage or looseness. If you find any, you can try to reconnect them or replace them with new ones. However, this might void your warranty, so proceed with caution.
- Calibrate the gimbal using the DJI GO app or the DJI Assistant 2 software. This will reset the gimbal settings and align it with the horizon. To calibrate the gimbal, follow these steps:
- Power on the Mavic Pro and connect it to your smartphone or tablet via the remote controller.
- Launch the DJI GO app and enter the camera view.
- Tap the three dots icon on the top right corner of the screen to access the settings menu.
- Tap the gimbal icon on the left side of the screen to access the gimbal settings.
- Tap the “Auto Calibrate Gimbal” option and follow the on-screen instructions.
- Wait until the calibration process is completed and the gimbal stops moving.
- Restart the Mavic Pro and check if the gimbal panning issue is resolved.
- Update the firmware of the Mavic Pro and the remote controller to the latest version. This will fix any software bugs or glitches that might affect the gimbal performance. To update the firmware, follow these steps:
- Download and install the DJI Assistant 2 software on your computer.
- Power on the Mavic Pro and connect it to your computer via the USB cable.
- Launch the DJI Assistant 2 software and log in with your DJI account.
- Click on the Mavic Pro icon that appears on the screen and enter the firmware update panel.
- Click on the “Upgrade” or “Refresh” button next to the latest firmware version and follow the on-screen instructions.
- Wait until the firmware update is completed and the Mavic Pro restarts automatically.
- Power on the remote controller and connect it to your computer via the USB cable.
- Click on the “GND for Mavic Pro” icon that appears on the screen and enter the firmware update panel.
- Click on the “Upgrade” or “Refresh” button next to the latest firmware version and follow the on-screen instructions.
- Wait until the firmware update is completed and the remote controller restarts automatically.
- Disconnect the Mavic Pro and the remote controller from your computer and check if the gimbal panning issue is resolved.
If none of the above solutions work, you might have a defective or damaged gimbal that needs to be repaired or replaced. In that case, you should contact DJI customer service or an authorized service center for assistance. Do not attempt to disassemble or modify the gimbal by yourself, as this might cause further damage or void your warranty.
2. Battery issues
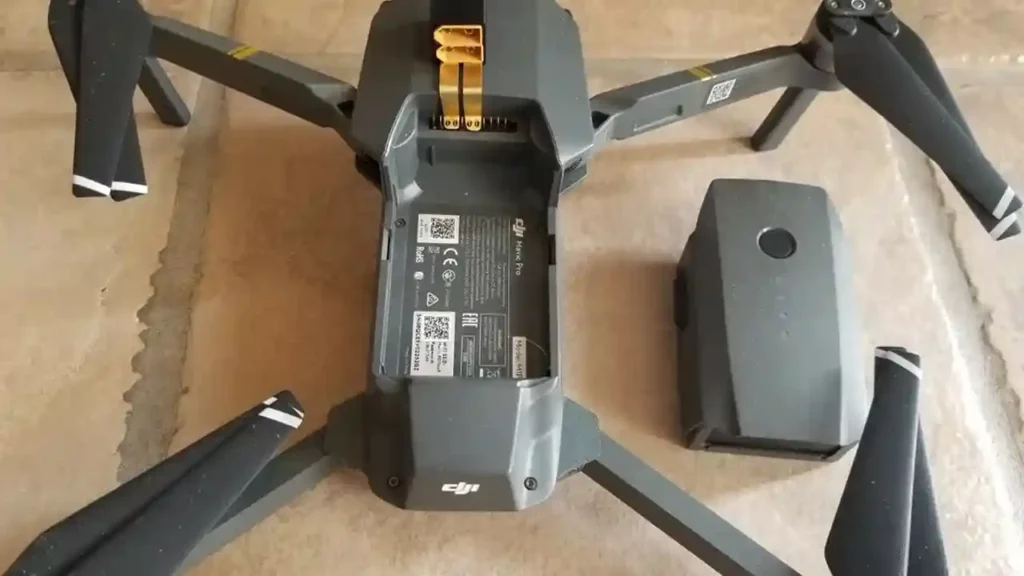
Another common problem with the Mavic Pro is the battery issue. The battery is the source of power for the drone and its accessories. Without a fully charged and functioning battery, the drone cannot fly or perform its tasks. The battery issue can manifest in different ways, such as:
- Battery not charging or holding charge
- Battery draining too fast or overheating
- Battery swelling or leaking
- Battery error messages or warnings
The battery issue can be caused by several factors, such as:
- Improper storage or handling of the battery
- Exposure to extreme temperatures or humidity
- Use of incompatible or damaged chargers or cables
- Software glitches or firmware updates
To fix the battery issue, you can try the following solutions:
- Charge the battery using the original charger and cable that came with the Mavic Pro. Make sure the charger and cable are in good condition and not damaged or frayed. Avoid using third-party or generic chargers or cables, as they might not be compatible or safe for the battery.
- Charge the battery in a cool and dry place, away from direct sunlight or heat sources. Do not charge the battery in a car or outdoors, as the temperature might fluctuate and damage the battery. Do not charge the battery when it is too hot or too cold, as this might affect its performance and lifespan. The optimal temperature range for charging the battery is between 5°C and 40°C.
- Check the battery level and status using the DJI GO app or the battery indicator on the battery itself. Do not overcharge or undercharge the battery, as this might reduce its capacity and longevity. The optimal battery level for storage is between 40% and 60%. Do not store the battery for more than three months without recharging it, as this might cause it to lose power or malfunction.
- Update the firmware of the Mavic Pro and the battery to the latest version. This will fix any software bugs or glitches that might affect the battery performance. To update the firmware, follow the same steps as mentioned in the previous section, but make sure the battery is inserted in the Mavic Pro before connecting it to your computer.
- Calibrate the battery using the DJI GO app or the DJI Assistant 2 software. This will reset the battery settings and optimize its performance. To calibrate the battery, follow these steps:
- Fully charge the battery using the original charger and cable.
- Power on the Mavic Pro and connect it to your smartphone or tablet via the remote controller.
- Launch the DJI GO app and enter the camera view.
- Tap the three dots icon on the top right corner of the screen to access the settings menu.
- Tap the battery icon on the left side of the screen to access the battery settings.
- Tap the “Advanced Settings” option and then tap the “Discharge” option.
- Set the discharge level to 8% and tap the “Apply” button.
- Wait until the battery discharges to 8% and then power off the Mavic Pro.
- Fully charge the battery again using the original charger and cable.
- Restart the Mavic Pro and check if the battery issue is resolved.
If none of the above solutions work, you might have a defective or damaged battery that needs to be replaced. In that case, you should contact DJI customer service or an authorized service center for assistance. Do not attempt to use, repair, or dispose of the battery by yourself, as this might cause fire, explosion, or injury.
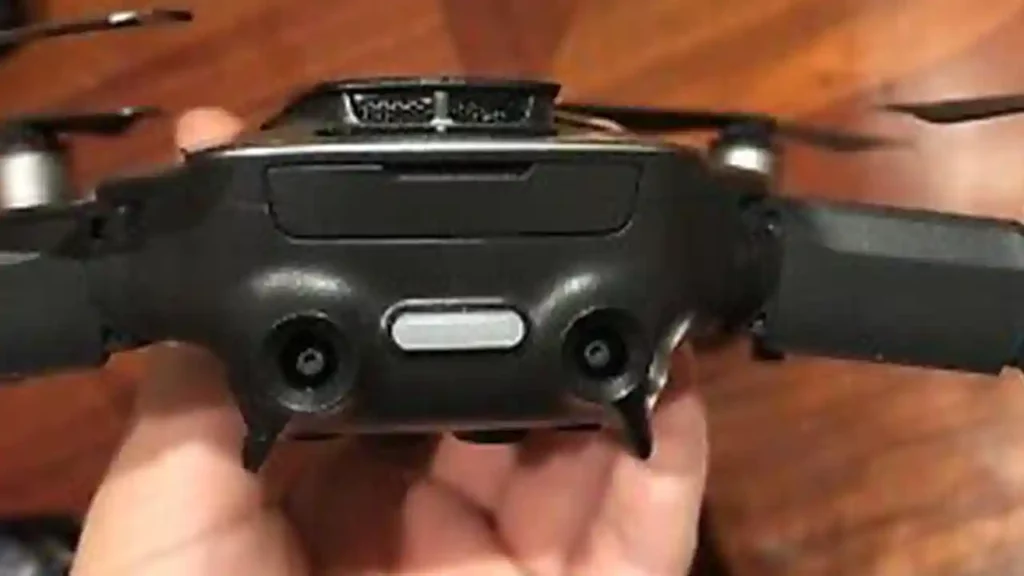
3. Remote controller issues
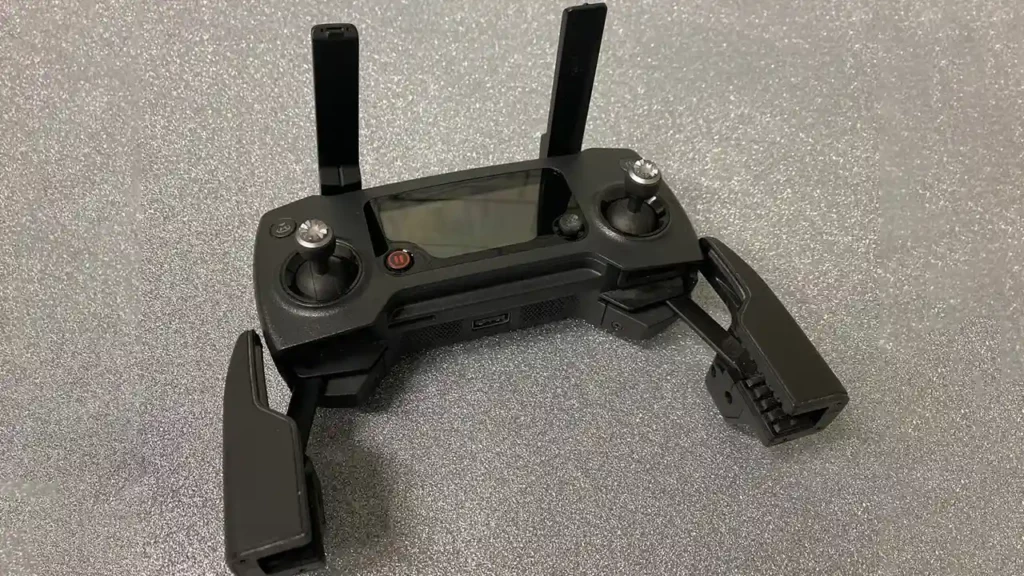
The remote controller is the device that allows you to control the Mavic Pro and its camera. It has a built-in screen, buttons, joysticks, and antennas. It also has a holder for your smartphone or tablet, which you can use to view the live video feed from the drone and access the DJI GO app. The remote controller is an essential part of the Mavic Pro system, and without it, you cannot fly the drone or adjust its settings.
One of the most common problems with the Mavic Pro remote controller is the connection issue. This is when the remote controller loses or fails to establish a connection with the Mavic Pro or your smartphone or tablet. This can result in loss of control, video signal, or telemetry data. The connection issue can be caused by several factors, such as:
- Low battery or interference on the remote controller or the Mavic Pro
- Damage to the remote controller or the Mavic Pro antennas or cables
- Obstacles or interference in the environment
- Software glitches or firmware updates
To fix the common problems with Mavic Pro remote controller connection issue, you can try the following solutions:
- Charge the remote controller and the Mavic Pro using the original chargers and cables. Make sure the chargers and cables are in good condition and not damaged or frayed. Avoid using third-party or generic chargers or cables, as they might not be compatible or safe for the devices.
- Check the remote controller and the Mavic Pro antennas and cables for any damage or looseness. If you find any, you can try to reconnect them or replace them with new ones. However, this might void your warranty, so proceed with caution.
- Relink the remote controller and the Mavic Pro using the DJI GO app or the linking button on the devices. This will re-establish the connection between the devices and sync their settings. To relink the remote controller and the Mavic Pro, follow these steps:
- Power on the Mavic Pro and the remote controller and connect them to your smartphone or tablet via the USB cable.
- Launch the DJI GO app and enter the camera view.
- Tap the three dots icon on the top right corner of the screen to access the settings menu.
- Tap the remote controller icon on the left side of the screen to access the remote controller settings.
- Tap the “Linking Remote Controller” option and then tap the “Master” option.
- Tap the “Linking” button and wait until the remote controller beeps.
- Press and hold the linking button on the Mavic Pro for about two seconds until the drone beeps.
- Wait until the remote controller and the Mavic Pro stop beeping and the connection is established.
- Restart the remote controller and the Mavic Pro and check if the connection issue is resolved.
- Update the firmware of the remote controller and the Mavic Pro to the latest version. This will fix any software bugs or glitches that might affect the connection performance. To update the firmware, follow the same steps as mentioned in the previous sections, but make sure the remote controller and the Mavic Pro are connected to your computer via the USB cables.
- Choose a clear and open area to fly the Mavic Pro and the remote controller. Avoid flying near obstacles or sources of interference, such as buildings, trees, power lines, or other drones. Keep the remote controller and the Mavic Pro within the recommended range and line of sight. The maximum transmission distance for the Mavic Pro and the remote controller is 7 km in FCC mode and 4 km in CE mode.
If none of the above solutions work, you might have a defective or damaged remote controller or Mavic Pro that needs to be repaired or replaced. In that case, you should contact DJI customer service or an authorized service center for assistance. Do not attempt to disassemble or modify the remote controller or the Mavic Pro by yourself, as this might cause further damage or void your warranty.
4. Video transmission issues
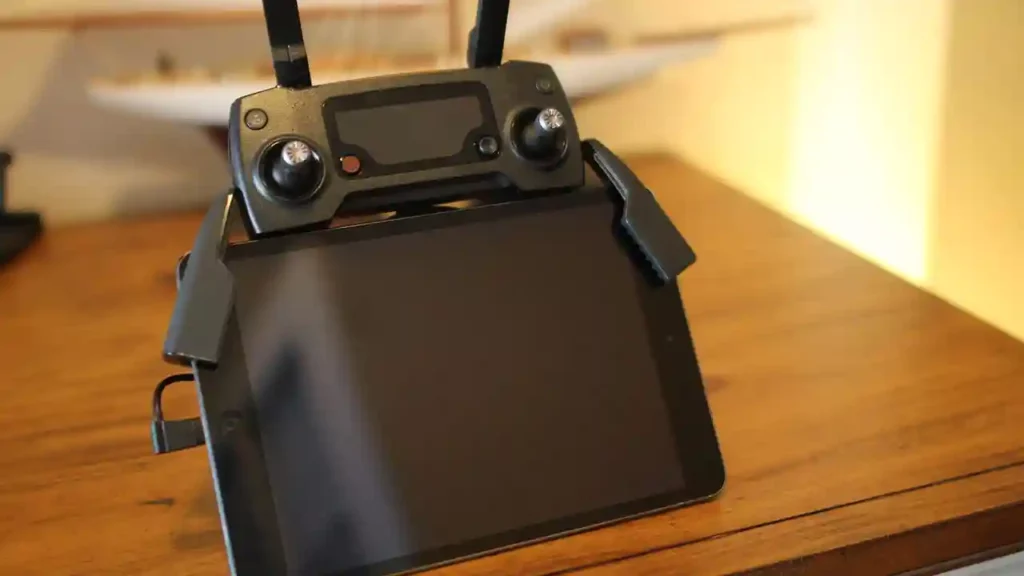
The video transmission is the feature that allows you to view the live video feed from the Mavic Pro camera on your smartphone or tablet via the DJI GO app. It also allows you to adjust the camera settings, take photos and videos, and access other functions of the app. The video transmission is one of the most useful and enjoyable features of the Mavic Pro, as it gives you a first-person view of the drone’s flight and lets you capture amazing shots.
One of the most common problems with the Mavic Pro video transmission is the lag or delay issue. This is when the video feed on your smartphone or tablet is not in sync with the actual movement of the Mavic Pro or its camera. This can result in poor image quality, missed shots, or loss of orientation. The lag or delay issue can be caused by several factors, such as:
- Low battery or interference on the remote controller, the Mavic Pro, or your smartphone or tablet
- Damage to the remote controller, the Mavic Pro, or your smartphone or tablet antennas or cables
- Obstacles or interference in the environment
- Software glitches or firmware updates
To fix the video transmission lag or delay issue, you can try the following solutions:
- Charge the remote controller, the Mavic Pro, and your smartphone or tablet using the original chargers and cables. Make sure the chargers and cables are in good condition and not damaged or frayed. Avoid using third-party or generic chargers or cables, as they might not be compatible or safe for the devices.
- Check the remote controller, the Mavic Pro, and your smartphone or tablet antennas and cables for any damage or looseness. If you find any, you can try to reconnect them or replace them with new ones. However, this might void your warranty, so proceed with caution.
- Relink the remote controller and the Mavic Pro using the DJI GO app or the linking button on the devices. This will re-establish the connection between the devices and sync their settings. To relink the remote controller and the Mavic Pro, follow the same steps as mentioned in the previous section.
- Update the firmware of the remote controller.
5. Camera issues

The camera is the device that allows you to capture photos and videos from the Mavic Pro. It has a 1/2.3 inch CMOS sensor, a 28 mm f/2.2 lens, and a 3-axis gimbal. It can shoot up to 12 megapixel stills and 4K videos at 30 fps. It also has various modes and settings that you can adjust to suit your needs and preferences. The camera is one of the most important and attractive features of the Mavic Pro, as it gives you the ability to record your drone’s adventures and share them with others.
One of the most common problems with the Mavic Pro camera is the focus issue. This is when the camera fails to focus on the subject or the scene, resulting in blurry or out-of-focus images and videos. The focus issue can be caused by several factors, such as:
- Damage to the camera or the gimbal
- Dust or dirt on the camera lens or the gimbal
- Incorrect or incompatible camera settings or modes
- Software glitches or firmware updates
To fix the common problems with Mavic Pro camera focus issue, you can try the following solutions:
- Clean the camera lens and the gimbal using a soft cloth or a lens cleaner. Make sure the camera lens and the gimbal are free of dust, dirt, fingerprints, or smudges. Do not use any abrasive or corrosive materials, as they might scratch or damage the camera lens or the gimbal.
- Check the camera settings and modes using the DJI GO app or the remote controller. Make sure the camera settings and modes are suitable for the subject or the scene you want to capture. For example, you can use the following settings and modes to improve the camera focus:
- Tap Focus: This is the default mode for the Mavic Pro camera. It allows you to tap on the screen to focus on a specific point or area. To use this mode, follow these steps:
- Power on the Mavic Pro and the remote controller and connect them to your smartphone or tablet via the USB cable.
- Launch the DJI GO app and enter the camera view.
- Tap the screen to focus on the point or area you want to capture.
- Press the shutter button or the record button to take a photo or a video.
- Auto Focus: This is the mode that automatically adjusts the focus based on the distance and the movement of the subject or the scene. To use this mode, follow these steps:
- Power on the Mavic Pro and the remote controller and connect them to your smartphone or tablet via the USB cable.
- Launch the DJI GO app and enter the camera view.
- Tap the three dots icon on the top right corner of the screen to access the settings menu.
- Tap the camera icon on the left side of the screen to access the camera settings.
- Tap the “Focus Mode” option and then tap the “Auto Focus” option.
- Press the shutter button or the record button to take a photo or a video.
- Manual Focus: This is the mode that allows you to manually adjust the focus using the slider on the screen. To use this mode, follow these steps:
- Power on the Mavic Pro and the remote controller and connect them to your smartphone or tablet via the USB cable.
- Launch the DJI GO app and enter the camera view.
- Tap the three dots icon on the top right corner of the screen to access the settings menu.
- Tap the camera icon on the left side of the screen to access the camera settings.
- Tap the “Focus Mode” option and then tap the “Manual Focus” option.
- Swipe the slider on the screen to adjust the focus.
- Press the shutter button or the record button to take a photo or a video.
- Tap Focus: This is the default mode for the Mavic Pro camera. It allows you to tap on the screen to focus on a specific point or area. To use this mode, follow these steps:
- Update the firmware of the Mavic Pro and the camera to the latest version. This will fix any software bugs or glitches that might affect the camera focus. To update the firmware, follow the same steps as mentioned in the previous sections, but make sure the camera is attached to the Mavic Pro before connecting it to your computer.
If none of the above solutions work, you might have a defective or damaged camera or gimbal that needs to be repaired or replaced. In that case, you should contact DJI customer service or an authorized service center for assistance. Do not attempt to disassemble or modify the camera or the gimbal by yourself, as this might cause further damage or void your warranty.
6. Propeller issues
The propellers are the devices that provide the thrust and the lift for the Mavic Pro. They are made of plastic and have a quick-release mechanism that allows you to attach and detach them easily. They also have a self-tightening design that prevents them from loosening during flight. The propellers are essential for the Mavic Pro’s flight performance and safety, and without them, the drone cannot fly or hover.
One of the most common problems with the Mavic Pro propellers is the noise issue. This is when the propellers produce a loud or annoying sound during flight, which can disturb you or others around you. The noise issue can be caused by several factors, such as:
- Damage or wear and tear to the propellers
- Improper installation or alignment of the propellers
- Interference from the wind or other objects
- Software glitches or firmware updates
To fix the propeller noise issue, you can try the following solutions:
- Check the propellers for any damage or wear and tear. If you find any, you should replace them with new ones. Do not use any propellers that are cracked, chipped, bent, or broken, as they might affect the flight performance and safety of the Mavic Pro. You can buy new propellers from DJI or other authorized dealers.
- Install and align the propellers correctly using the quick-release mechanism and the self-tightening design. Make sure the propellers are securely attached and not loose or wobbly. Do not use any tools or force to install or remove the propellers, as this might damage them or the motors. To install and align the propellers, follow these steps:
- Power off the Mavic Pro and place it on a flat and stable surface.
- Locate the propeller with the white ring and the motor with the white dot. Align the propeller with the motor and push it down. Twist it clockwise until it locks in place. You should hear a click sound when the propeller is locked.
- Locate the propeller without the white ring and the motor without the white dot. Align the propeller with the motor and push it down. Twist it counterclockwise until it locks in place. You should hear a click sound when the propeller is locked.
- Repeat the same steps for the other propellers and motors.
- Check if the propellers are installed and aligned correctly by spinning them with your fingers. They should spin freely and smoothly without any resistance or wobbling.
- Choose a calm and open area to fly the Mavic Pro and the propellers. Avoid flying near sources of noise or interference, such as traffic, crowds, or other drones. Keep the Mavic Pro and the propellers within the recommended range and line of sight. The maximum flight speed for the Mavic Pro and the propellers is 65 km/h in Sport mode and 36 km/h in other modes.
- Update the firmware of the Mavic Pro and the propellers to the latest version. This will fix any software bugs or glitches that might affect the propeller noise. To update the firmware, follow the same steps as mentioned in the previous sections, but make sure the propellers are attached to the Mavic Pro before connecting it to your computer.
If none of the above solutions work, you might have a defective or damaged propeller or motor that needs to be repaired or replaced. In that case, you should contact DJI customer service or an authorized service center for assistance. Do not attempt to disassemble or modify the propellers or the motors by yourself, as this might cause further damage or void your warranty.
7. Obstacle avoidance issues
The obstacle avoidance is the feature that allows the Mavic Pro to detect and avoid obstacles in its flight path. It uses a combination of sensors, such as the forward and downward vision systems, the infrared sensing system, and the ultrasonic system. It also uses a flight control system that analyzes the sensor data and adjusts the flight speed and direction accordingly. The obstacle avoidance is a useful and safety feature of the Mavic Pro, as it prevents the drone from crashing into objects or people.
One of the most common problems with the Mavic Pro obstacle avoidance is the false alarm issue. This is when the obstacle avoidance system detects an obstacle that is not there or is too far away, and triggers a warning or a braking action. This can result in unnecessary interruptions, delays, or deviations in the flight plan. The false alarm issue can be caused by several factors, such as:
- Damage or dirt on the sensors or the lenses
- Interference from the sunlight or other light sources
- Reflections or shadows from the ground or other objects
- Software glitches or firmware updates
To fix the common problems with Mavic Pro obstacle avoidance false alarm issue, you can try the following solutions:
- Clean the sensors and the lenses using a soft cloth or a lens cleaner. Make sure the sensors and the lenses are free of dust, dirt, fingerprints, or smudges. Do not use any abrasive or corrosive materials, as they might scratch or damage the sensors or the lenses.
- Check the obstacle avoidance settings and modes using the DJI GO app or the remote controller. Make sure the obstacle avoidance settings and modes are suitable for the flight conditions and your preferences. For example, you can use the following settings and modes to adjust the obstacle avoidance sensitivity and behavior:
- Obstacle Sensing: This is the setting that enables or disables the obstacle avoidance feature. To access this setting, follow these steps:
- Power on the Mavic Pro and the remote controller and connect them to your smartphone or tablet via the USB cable.
- Launch the DJI GO app and enter the camera view.
- Tap the three dots icon on the top right corner of the screen to access the settings menu.
- Tap the aircraft icon on the left side of the screen to access the aircraft settings.
- Tap the “Obstacle Sensing” option and then tap the switch to turn it on or off.
- Obstacle Avoidance: This is the mode that automatically stops or slows down the Mavic Pro when it detects an obstacle in its flight path. To access this mode, follow these steps:
- Power on the Mavic Pro and the remote controller and connect them to your smartphone or tablet via the USB cable.
- Launch the DJI GO app and enter the camera view.
- Tap the three dots icon on the top right corner of the screen to access the settings menu.
- Tap the aircraft icon on the left side of the screen to access the aircraft settings.
- Tap the “Obstacle Avoidance” option and then tap the switch to turn it on or off.
- Obstacle Avoidance Action: This is the setting that determines what the Mavic Pro will do when it encounters an obstacle in its flight path. It has three options: Brake, Bypass, and Hover. To access this setting, follow these steps:
- Power on the Mavic Pro and the remote controller and connect them to your smartphone or tablet via the USB cable.
- Launch the DJI GO app and enter the camera view.
- Tap the three dots icon on the top right corner of the screen to access the settings menu.
- Tap the aircraft icon on the left side of the screen to access the aircraft settings.
- Tap the “Obstacle Avoidance Action” option and then tap the option you want to choose.
- Obstacle Sensing: This is the setting that enables or disables the obstacle avoidance feature. To access this setting, follow these steps:
- Update the firmware of the Mavic Pro and the obstacle avoidance system to the latest version. This will fix any software bugs or glitches that might affect the obstacle avoidance performance. To update the firmware, follow the same steps as mentioned in the previous sections, but make sure the Mavic Pro is connected to your computer via the USB cable.
- Choose a clear and open area to fly the Mavic Pro and the obstacle avoidance system. Avoid flying near obstacles or sources of interference, such as buildings, trees, power lines, or other drones. Keep the Mavic Pro and the obstacle avoidance system within the recommended range and line of sight. The maximum detection range for the Mavic Pro and the obstacle avoidance system is 15 m in front and 10 m below.
If none of the above solutions work, you might have a defective or damaged obstacle avoidance system that needs to be repaired or replaced. In that case, you should contact DJI customer service or an authorized service center for assistance. Do not attempt to disassemble or modify the obstacle avoidance system by yourself, as this might cause further damage or void your warranty.
8. Overheating issues
The overheating is the problem that occurs when the Mavic Pro or its components become too hot and exceed the normal operating temperature. This can affect the performance, safety, and lifespan of the drone and its accessories. The overheating issue can manifest in different ways, such as:
- Warning messages or beeps on the Mavic Pro or the remote controller
- Reduced flight time or range
- Reduced camera quality or functionality
- Reduced battery capacity or longevity
- Damage or deformation to the drone or its components
The overheating issue can be caused by several factors, such as:
- Exposure to high temperatures or direct sunlight
- Prolonged or intensive use of the drone or its components
- Improper storage or ventilation of the drone or its components
- Software glitches or firmware updates
To fix the common problems with Mavic Pro overheating issue, you can try the following solutions:
- Cool down the Mavic Pro and its components using a fan or an air conditioner. Make sure the Mavic Pro and its components are not too hot to touch before using them again. Do not use any water or ice to cool down the drone or its components, as this might cause short circuits or corrosion.
- Avoid flying the Mavic Pro and its components in high temperatures or direct sunlight. Do not fly the drone or its components when the ambient temperature is above 40°C or below 0°C. Do not leave the drone or its components in a car or outdoors, as the temperature might fluctuate and damage them.
- Limit the flight time and the range of the Mavic Pro and its components. Do not fly the drone or its components for more than 30 minutes or more than 7 km in a single session. Do not fly the drone or its components in Sport mode or other high-performance modes for too long, as this might increase the heat generation and consumption.
- Store and transport the Mavic Pro and its components in a cool and dry place, away from direct sunlight or heat sources. Use the original carrying case or a compatible case to protect the drone and its components from dust, moisture, or impact. Do not store the drone or its components with the battery inserted, as this might cause the battery to drain or overheat.
- Update the firmware of the Mavic Pro and its components to the latest version. This will fix any software bugs or glitches that might affect the overheating issue. To update the firmware, follow the same steps as mentioned in the previous sections, but make sure the Mavic Pro and its components are connected to your computer via the USB cables.
If none of the above solutions work, you might have a defective or damaged Mavic Pro or its components that need to be repaired or replaced. In that case, you should contact DJI customer service or an authorized service center for assistance. Do not attempt to use or fly the Mavic Pro or its components when they are overheating, as this might cause fire, explosion, or injury.
9. SD card issues
The SD card is the device that allows you to store the photos and videos that you capture with the Mavic Pro camera. It has a slot on the side of the drone that you can insert and remove the SD card easily. It also has a capacity and a speed that determine how much and how fast you can store the data. The SD card is a convenient and essential feature of the Mavic Pro, as it enables you to save and transfer your media files.
One of the most common problems with the Mavic Pro SD card is the error issue. This is when the SD card fails to read or write the data, resulting in corrupted or missing files. The error issue can be caused by several factors, such as:
- Damage or dirt on the SD card or the slot
- Improper insertion or removal of the SD card
- Incompatible or faulty SD card
- Software glitches or firmware updates
To fix the common problems with Mavic Pro SD card error issue, you can try the following solutions:
- Clean the SD card and the slot using a soft cloth or a brush. Make sure the SD card and the slot are free of dust, dirt, fingerprints, or smudges. Do not use any abrasive or corrosive materials, as they might scratch or damage the SD card or the slot.
- Insert and remove the SD card correctly using the slot on the side of the drone. Make sure the SD card is oriented and aligned properly before inserting it into the slot. Do not force or bend the SD card, as this might damage it or the slot. Do not insert or remove the SD card when the drone is powered on, as this might cause data loss or corruption.
- Use a compatible and reliable SD card for the Mavic Pro and its camera. The recommended SD card for the Mavic Pro and its camera is the UHS-I Speed Class 3 (U3) micro SD card with a capacity of up to 64 GB. Do not use any SD card that is fake, damaged, or formatted incorrectly, as this might affect the data quality and reliability.
- Format the SD card using the DJI GO app or the remote controller. This will erase all the data on the SD card and optimize its performance. To format the SD card, follow these steps:
- Power on the Mavic Pro and the remote controller and connect them to your smartphone or tablet via the USB cable.
- Launch the DJI GO app and enter the camera view.
- Tap the three dots icon on the top right corner of the screen to access the settings menu.
- Tap the camera icon on the left side of the screen to access the camera settings.
- Tap the “Format SD Card” option and confirm your choice.
- Wait until the formatting process is completed and the app shows a green check mark.
- Restart the Mavic Pro and the remote controller and check if the SD card error issue is resolved.
- Update the firmware of the Mavic Pro and the SD card to the latest version. This will fix any software bugs or glitches that might affect the SD card error issue. To update the firmware, follow the same steps as mentioned in the previous sections, but make sure the SD card is inserted in the Mavic Pro before connecting it to your computer.
If none of the above solutions work, you might have a defective or damaged SD card or slot that needs to be repaired or replaced. In that case, you should contact DJI customer service or an authorized service center for assistance. Do not attempt to use or fly the Mavic Pro without a SD card, as this might cause data loss or malfunction.
In conclusion, the Mavic Pro is a great drone that offers many features and functions, but it can also encounter some problems that can affect its performance, safety, and user experience. By following our advice, you will be able to enjoy your Mavic Pro to the fullest and avoid any frustration or disappointment.